Instructions
1
| source <(kubectl completion bash)
|
1
2
| alias k=kubectl
complete -o default -F __start_kubectl k
|
1
| echo 'export WINDOWS=/mnt/c/Users/${USER}/' >> ~/.bashrc
|
Terminal Basic
- Ctrl + z: 讓前台指令移轉至後台並處於暫停的狀態
Namespace
1
| k create namespace practice-231216
|
- Change Namespace for all subsequent commands
1
| k config set-context --current --namespace=practice-231216
|
1
| k config view --minify | grep namespace:
|
Pod
1
2
3
4
5
6
7
8
9
10
11
12
| apiVersion: v1
kind: Pod
metadata:
name: nginx-231204
labels:
hour: 15
spec:
containers:
- name: nginx
image: nginx:1.14.2
ports:
- containerPort: 80
|
1
| kubectl run nginx --image=nginx:1.14.2 --dry-run=client -o yaml > pod.yaml
|
1
| k get pods --show-labels
|
1
| k get pods --field-selector=status.phase=Succeeded
|
- 透過 filter 出來的 json 配置文件來刪除對應的 pod
1
| k get pods --field-selector=status.phase=Succeeded -o json | k delete -f -
|
- 取出 traefik deployment 中 livenessProbe 內容
1
| k get deploy traefik -o jsonpath='{.spec.template.spec.containers[*].livenessProbe}'
|
1
| k delete pod --field-selector=status.phase=Succeeded
|
1
| k delete pods -l app=web-crawler
|
1
| k delete pod --field-selector=status.phase=Succeeded -l app=klikbca-crawler
|
1
| k describe pod ${POD_NAME}
|
1
| k get events --sort-by=.lastTimestamp
|
1
| k port-forward pod/${POD_NAME} <local-port>:<container-port>
|
(Note.)
- nginx 跑在 80 port
- 在WSL中,某些低於 1024 的 port 可能需要 root(sudo) 權限
1
| k exec -it ${POD_NAME} -- netstat -tulpn
|
1
| k exec -it ${POD_NAME} -- bash
|
1
| echo 'Hello Bear' > /usr/share/nginx/html/index.html
|
1
| k logs -f ${POD_NAME} -c ${CONTAINER_NAME} --tail=5 --timestamps
|
(Note.)
- -f, –follow : 即時跟蹤 log 的變化。
- –tail : 顯示顯示數量的最後幾行。
- –timestamps : 顯示 timestamp。
1
| k delete pod ${POD_NAME}
|
1
| k label pod ${POD_NAME} ${KEY}=${VALUE}
|
1
| k get pods --show-labels
|
1
| k label pod ${POD_NAME} ${KEY}-
|
1
| k run foobar --rm -it --image=busybox -- bash
|
(Note.)
–rm: 執行結束後刪除
Top
- 可以用來看 resource CPU/memory
Volume
1
| k run nginx-volume --image=nginx:1.16 --dry-run=client -o yaml > nginx-volume.yaml
|
1
2
3
4
5
6
7
8
9
10
11
12
13
14
15
| apiVersion: v2
kind: Pod
metadata:
creationTimestamp: null
labels:
run: nginx-volume
name: nginx-volume
spec:
containers:
- image: nginx:1.16
name: nginx-volume
resources: {}
dnsPolicy: ClusterFirst
restartPolicy: Always
status: {}
|
Service
1
| k expose deployment nginx-deployment-15 --port=81 --target-port=80 --protocol=TCP --name=rover --type=NodePort -o yaml --dry-run=client > rover.yaml
|
(Note.)
- 若直接 create service,需手動寫好 label 來關聯 deployment!!!
Secret
1
| k create secret generic --from-literal=key1=value2 -h --dry-run=client -o yaml > another-secret.yaml
|
1
| k apply -f another-secret.yaml
|
1
| k run nginx-secret --image=nginx:1.16 --dry-run=client -o yaml > nginx-secret.yaml
|
1
2
3
4
5
6
7
8
9
10
11
12
13
14
15
| apiVersion: v1
kind: Pod
metadata:
creationTimestamp: null
labels:
run: nginx-secret
name: nginx-secret
spec:
containers:
- image: nginx:1.16
name: nginx-secret
resources: {}
dnsPolicy: ClusterFirst
restartPolicy: Always
status: {}
|
- Add secret settings (env & secret KeyRef)
1
2
3
4
5
6
7
8
9
10
11
12
13
14
15
16
17
18
19
20
21
| apiVersion: v1
kind: Pod
metadata:
creationTimestamp: null
labels:
run: nginx-secret
name: nginx-secret
spec:
containers:
- image: nginx:1.16
name: nginx-secret
resources: {}
env:
- name: COOL_VARIABLE
valueFrom:
secretKeyRef:
name: another-secret
key: key1
dnsPolicy: ClusterFirst
restartPolicy: Always
status: {}
|
ConfigMap
1
| k create configmap some-config --from-literal=key3=value4 --dry-run=client -o yaml > some-config.yaml
|
1
| k apply -f some-config.yaml
|
- Create nginx-configmap.yaml
1
| k run nginx-configmap --image=nginx:stable --dry-run=client -o yaml > nginx-configmap.yaml
|
1
2
3
4
5
6
7
8
9
10
11
12
13
14
15
| apiVersion: v1
kind: Pod
metadata:
creationTimestamp: null
labels:
run: nginx-configmap
name: nginx-configmap
spec:
containers:
- image: nginx:stable
name: nginx-configmap
resources: {}
dnsPolicy: ClusterFirst
restartPolicy: Always
status: {}
|
- Add configmap settings (volumeMounts & volumes)
1
2
3
4
5
6
7
8
9
10
11
12
13
14
15
16
17
18
19
20
21
22
23
| apiVersion: v1
kind: Pod
metadata:
creationTimestamp: null
labels:
run: nginx-configmap
name: nginx-configmap
spec:
containers:
- image: nginx:stable
name: nginx-configmap
resources: {}
volumeMounts:
- name: some-config
mountPath: "/some/path"
readOnly: true
dnsPolicy: ClusterFirst
restartPolicy: Always
volumes:
- name: some-config
configMap:
name: some-config
status: {}
|
Deployment
DaemonSet
StatefulSet
建立 redis cluster 為例
1
2
3
4
5
6
7
8
9
10
11
12
13
14
15
16
17
18
19
20
21
22
23
24
25
26
27
28
29
30
31
32
33
34
35
36
37
38
39
40
41
42
43
44
45
46
47
48
49
50
51
52
53
54
55
56
57
58
59
60
61
62
63
64
65
66
67
68
69
70
71
72
73
74
75
76
77
78
79
80
81
82
83
84
85
86
87
88
89
90
91
92
93
94
95
96
97
98
99
100
101
102
103
104
105
106
107
108
109
110
| apiVersion: v1
kind: ConfigMap
metadata:
name: mario-redis-cluster-config
namespace: mario
data:
redis.conf: |
appendonly yes
cluster-enabled yes
cluster-config-file /var/lib/redis/nodes.conf
dir /var/lib/redis
port 6379
---
apiVersion: v1
kind: Service
metadata:
name: mario-redis-headless-server
namespace: mario
labels:
app: redis-cluster-app
spec:
ports:
- name: redis-port
port: 6379
clusterIP: None
selector:
app: redis-cluster-app
---
apiVersion: apps/v1
kind: StatefulSet
metadata:
name: mario-redis-app
namespace: mario
spec:
selector:
matchLabels:
app: redis-cluster-app
serviceName: "mario-redis-headless-server"
replicas: 6
template:
metadata:
labels:
app: redis-cluster-app
spec:
dnsConfig:
options:
- name: ndots
value: "1"
containers:
- name: redis
image: "redis:6.0.9-alpine"
env:
- name: MY_POD_IP
valueFrom:
fieldRef:
fieldPath: status.podIP
command: [ "redis-server" ]
args: [ "/etc/redis/redis.conf", "--protected-mode", "no", "--cluster-announce-ip", "$(MY_POD_IP)" ]
ports:
- name: redis
containerPort: 6379
protocol: "TCP"
- name: cluster
containerPort: 16379
protocol: "TCP"
volumeMounts:
- name: "redis-conf"
mountPath: "/etc/redis"
- name: "redis-data"
mountPath: "/var/lib/redis"
resources:
limits:
cpu: "50m"
memory: "100Mi"
requests:
cpu: "20m"
memory: "50Mi"
volumes:
- name: "redis-data"
emptyDir: {}
- name: "redis-conf"
configMap:
name: "mario-redis-cluster-config"
items:
- key: "redis.conf"
path: "redis.conf"
volumeClaimTemplates:
- metadata:
name: redis-data
spec:
accessModes: [ "ReadWriteOnce" ]
resources:
requests:
storage: 1Gi
---
apiVersion: v1
kind: Service
metadata:
name: mario-redis-service
namespace: mario
labels:
app: redis-cluster-app
spec:
ports:
- name: redis-port
protocol: "TCP"
port: 6379
targetPort: 6379
selector:
app: redis-cluster-app
|
創建 redis cluster 關係
1
| k get pods -l app=redis-cluster-app -o jsonpath='{range.items[*]}{.status.podIP}:6379 {end}'
|
1
| k exec -it mario-redis-app-0 -- redis-cli --cluster create --cluster-replicas 1 {填上上面指令取得的 IP}
|
解除 redis cluster 關係
1
2
3
4
5
| for ($i=0; $i<6; $i++)
{
Write-Host "Resetting mario-redis-app-$i"
kubectl exec -it "mario-redis-app-$i" -- redis-cli CLUSTER RESET
}
|
查看 redis cluster 關係
1
| k exec -it mario-redis-app-0 -- redis-cli cluster nodes
|
1
| k exec -it mario-redis-app-0 -- redis-cli -c
|
Job
CronJob
Rollout & Rollback
指令都是 rollout
1
| k rollout history deployment webapp
|
1
| k rollout undo deployment webapp
|
Pod Lifecycle
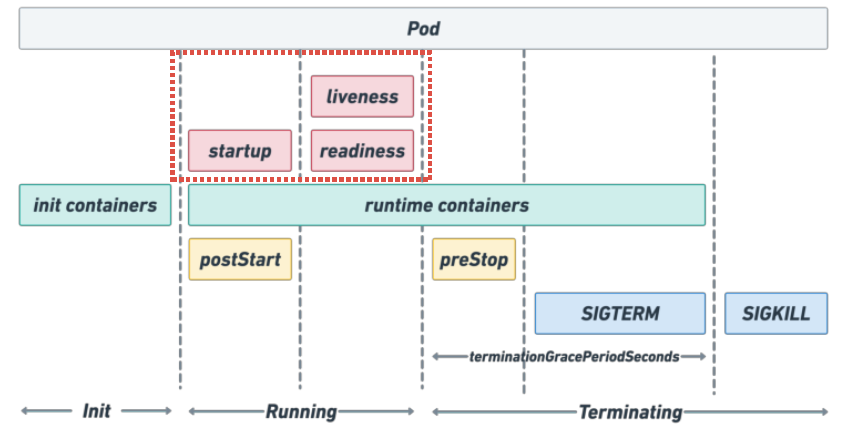
Probe
IngressClass
Ingress
GatewayClass
Gateway
Affinity & Anti-Affinity
RBAC
Role
1
| k create role roleForList -o yaml --dry-run=client --verb=list --resource=pod -n default
|
1
2
3
4
5
6
7
8
9
10
11
12
13
| apiVersion: rbac.authorization.k8s.io/v1
kind: Role
metadata:
creationTimestamp: null
name: pod-reader
namespace: default
rules:
- apiGroups:
- ""
resources:
- pods
verbs:
- list
|
RoleBinding
1
| k create rolebinding pod-reader-binding --role=pod-reader --dry-run=client -o yaml -n dev --serviceaccount=dev:sa
|
1
2
3
4
5
6
7
8
9
10
11
12
13
14
| apiVersion: rbac.authorization.k8s.io/v1
kind: RoleBinding
metadata:
creationTimestamp: null
name: pod-reader-binding
namespace: dev
roleRef:
apiGroup: rbac.authorization.k8s.io
kind: Role
name: pod-reader
subjects:
- kind: ServiceAccount
name: sa
namespace: dev
|
Scale
1
| k scale deployment webapp --replicas=2
|
Redeploy
1
| k rollout restart deployment webapp
|
Others
Explain
1
| k explain pod.spec.containers.resources.requests
|
Kubernetes Local
- Download Kubernetes Cluster token from Rancher
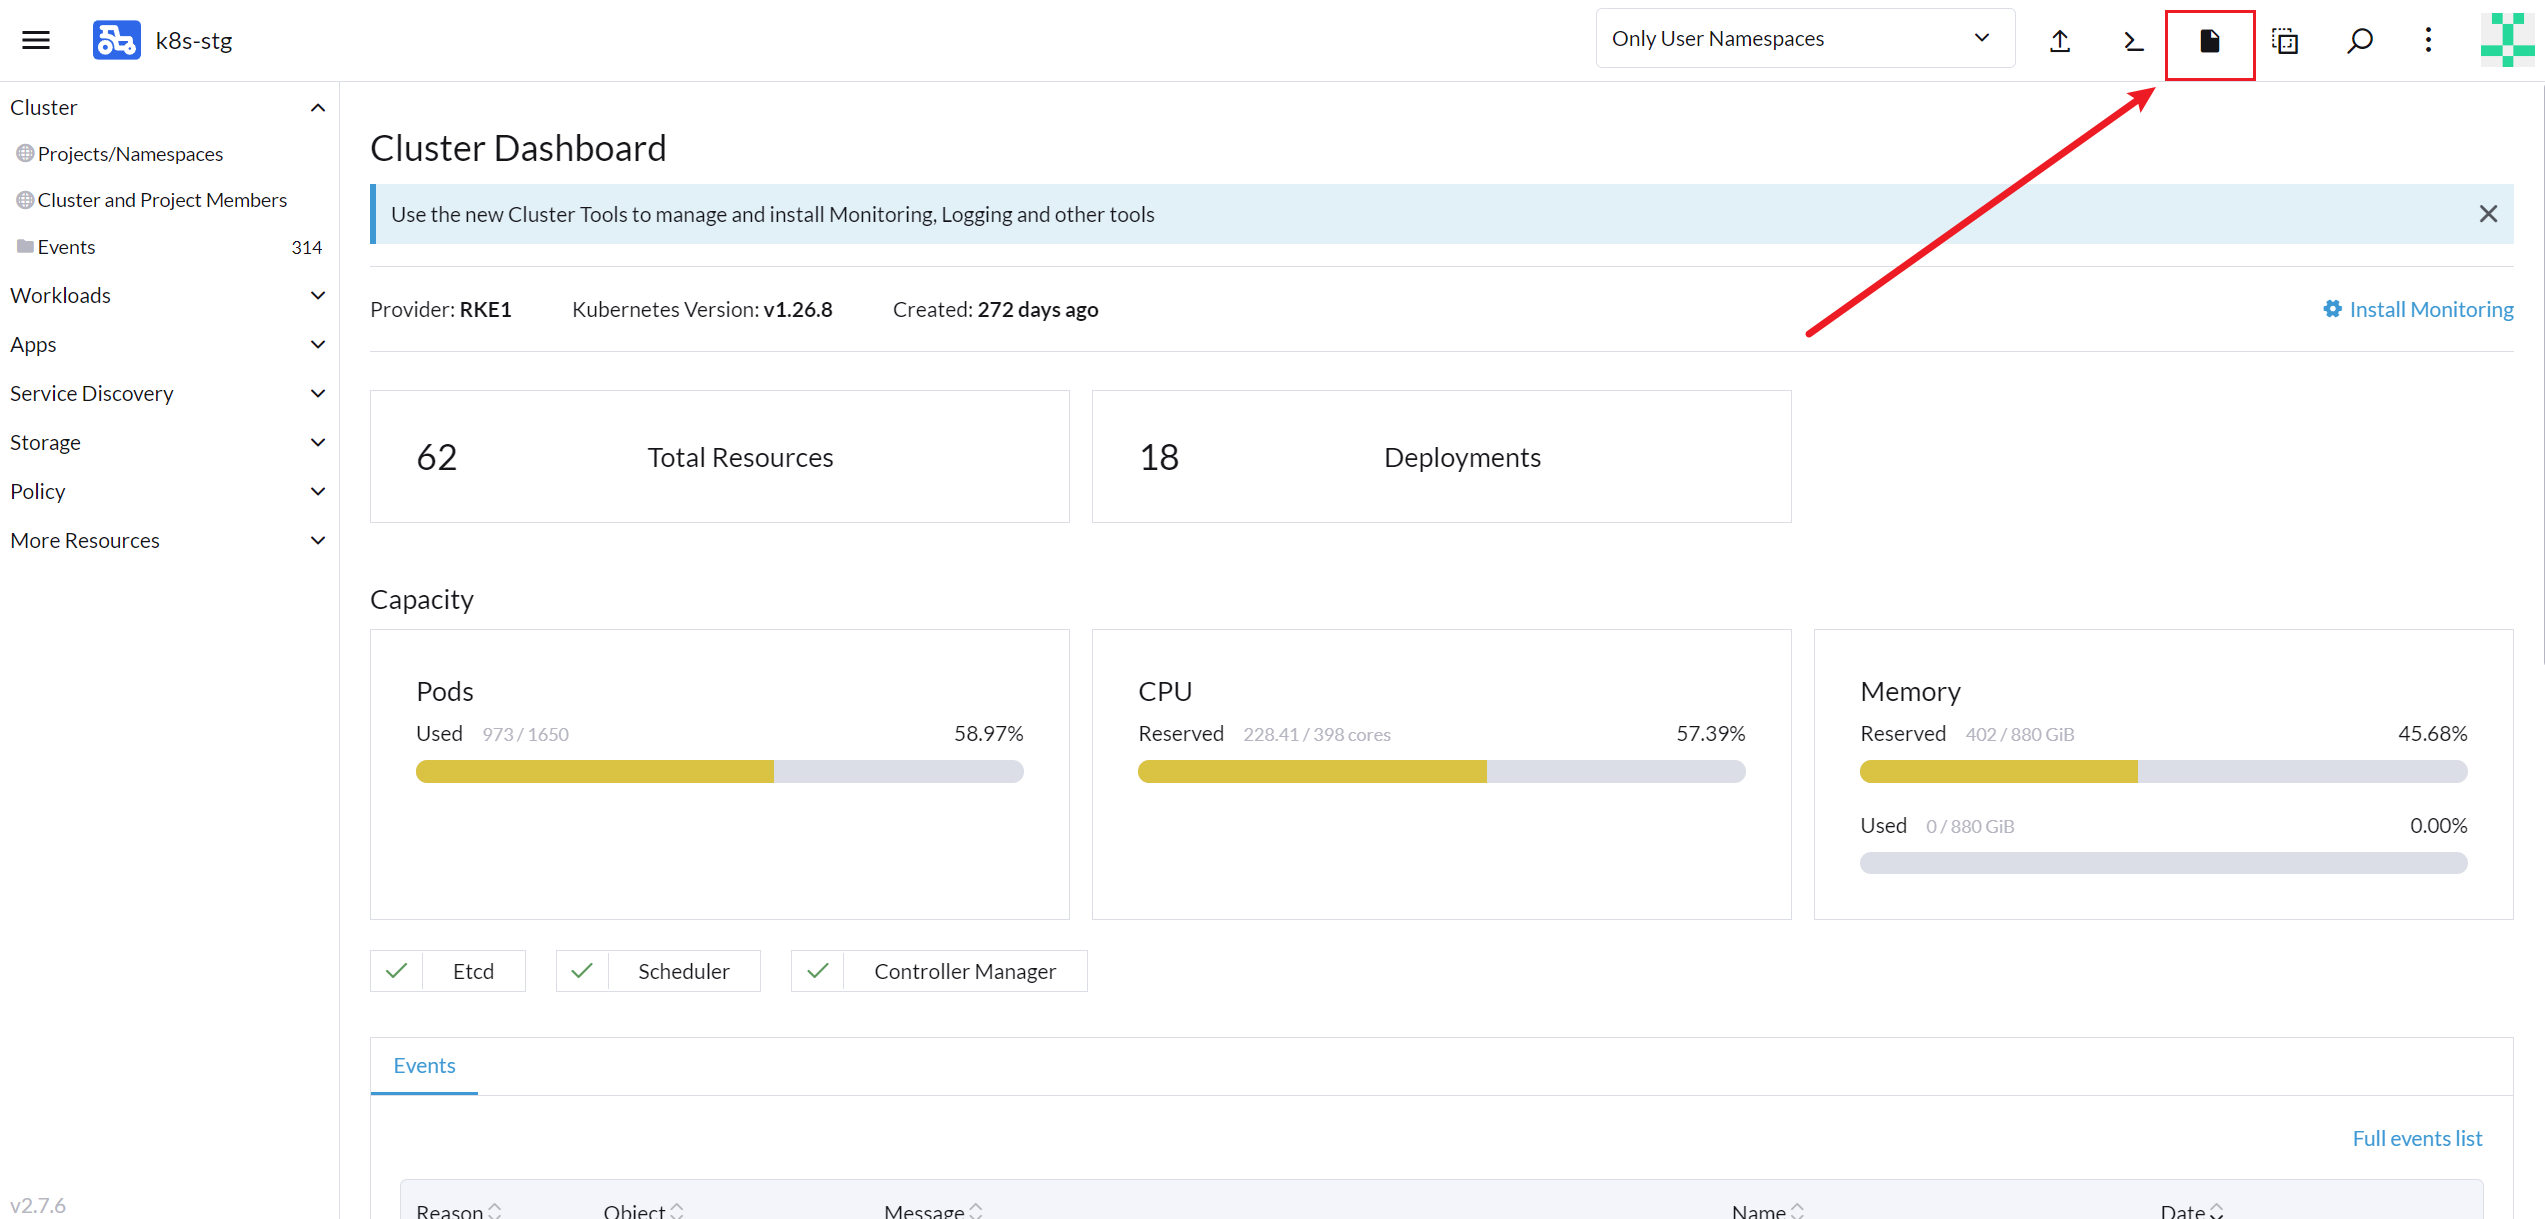
- Put them to a separated folder and explore by command
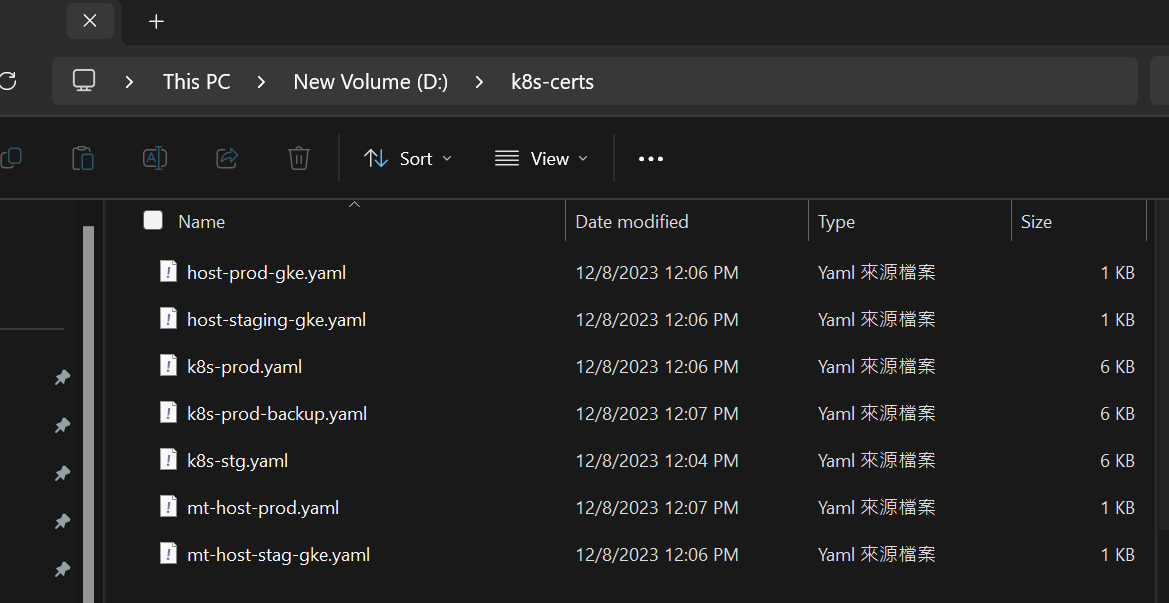
1
| kubectl get pod -n b2c-payment --kubeconfig='D:/k8s-certs/k8s-stg.yaml'
|
- Easy way to switch between different clusters via wsl bash
1
| KUBECONFIG=./host-uat-gke.yaml:./host-prod-gke.yaml:./host-staging-gke.yaml:./k8s-prod-backup.yaml:./k8s-prod.yaml:./k8s-stg.yaml:./mt-host-prod.yaml:./mt-host-stag-gke.yaml kubectl config view --flatten > config
|
- Put the outputed file config to ~/.kube
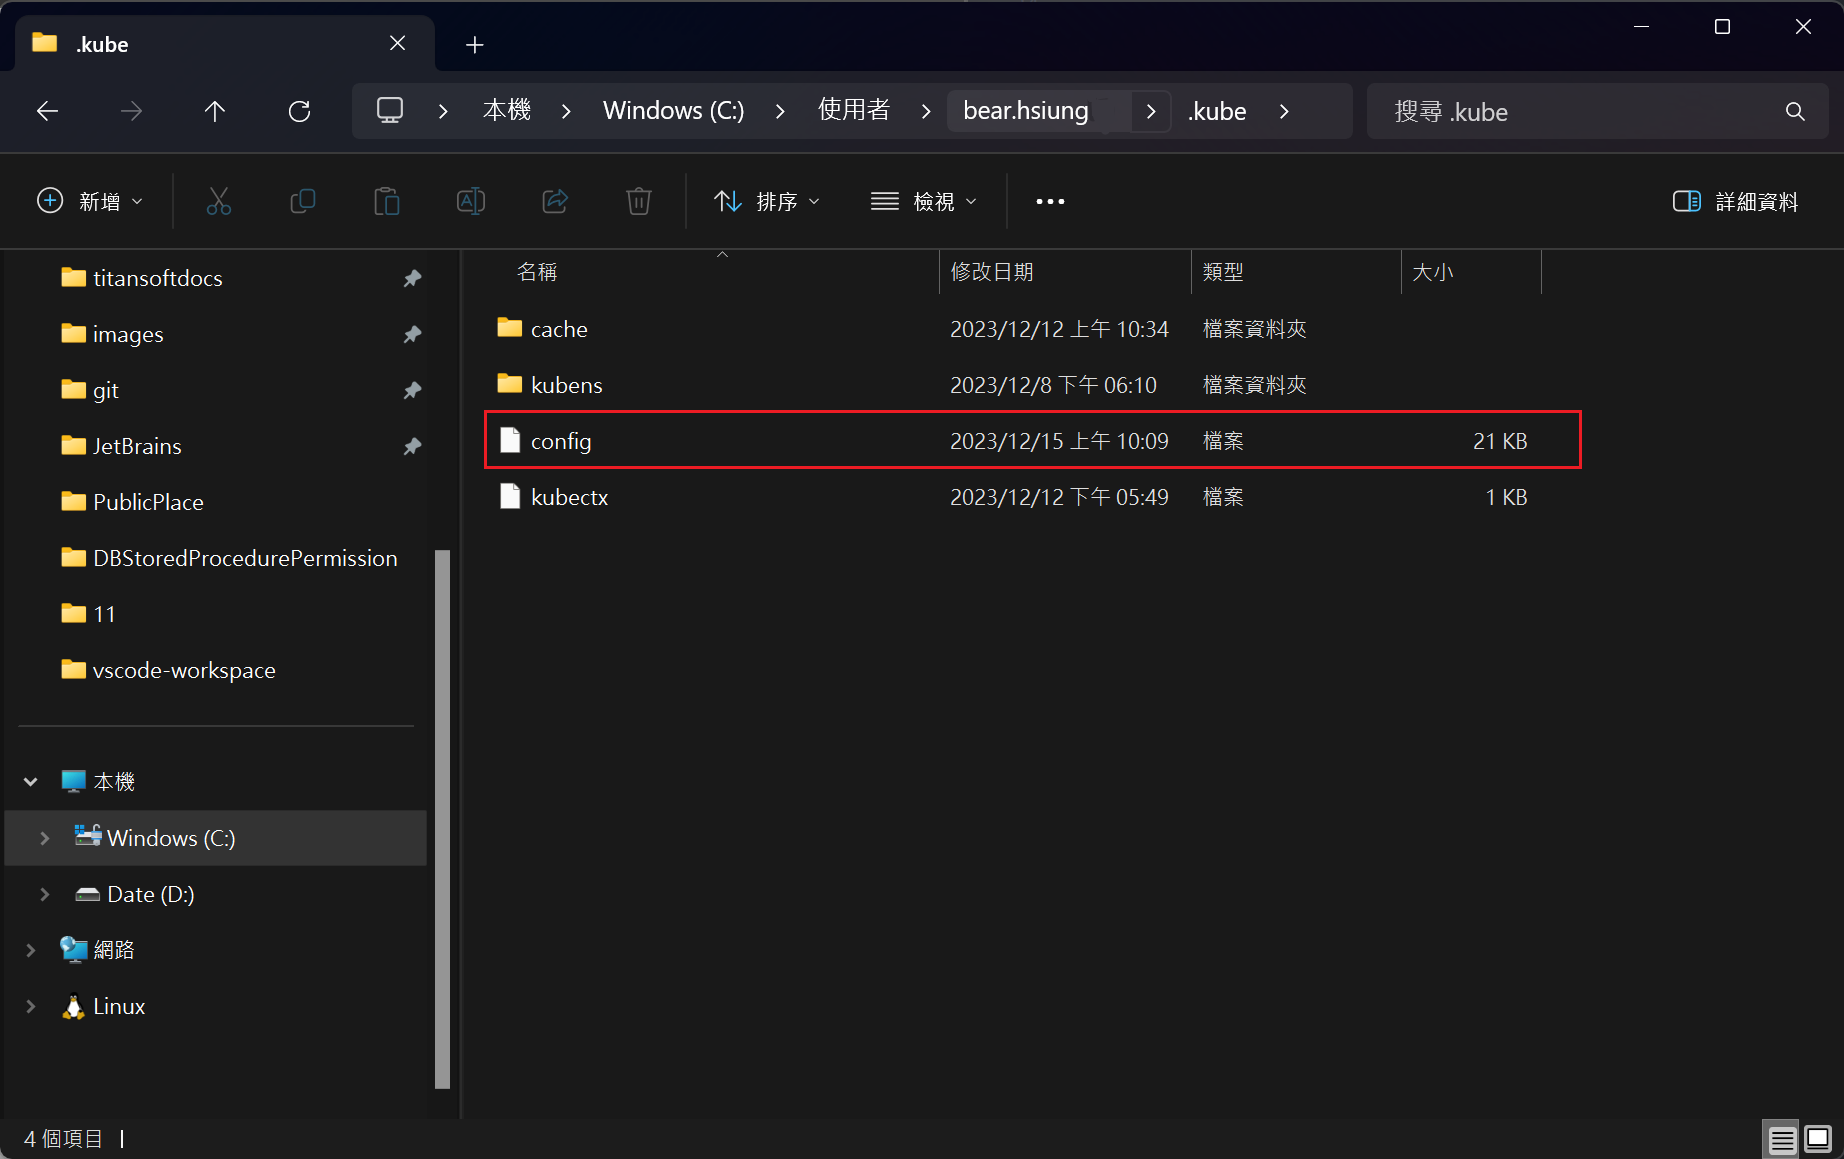
- Restart your Powershell and type command
1
2
| kubectl config use-context k8s-stg
kubectl get pod -n b2c-payment
|
- Install kubectx and fzf for fast switching
1
2
| scoop install kubectx
scoop install fzf
|
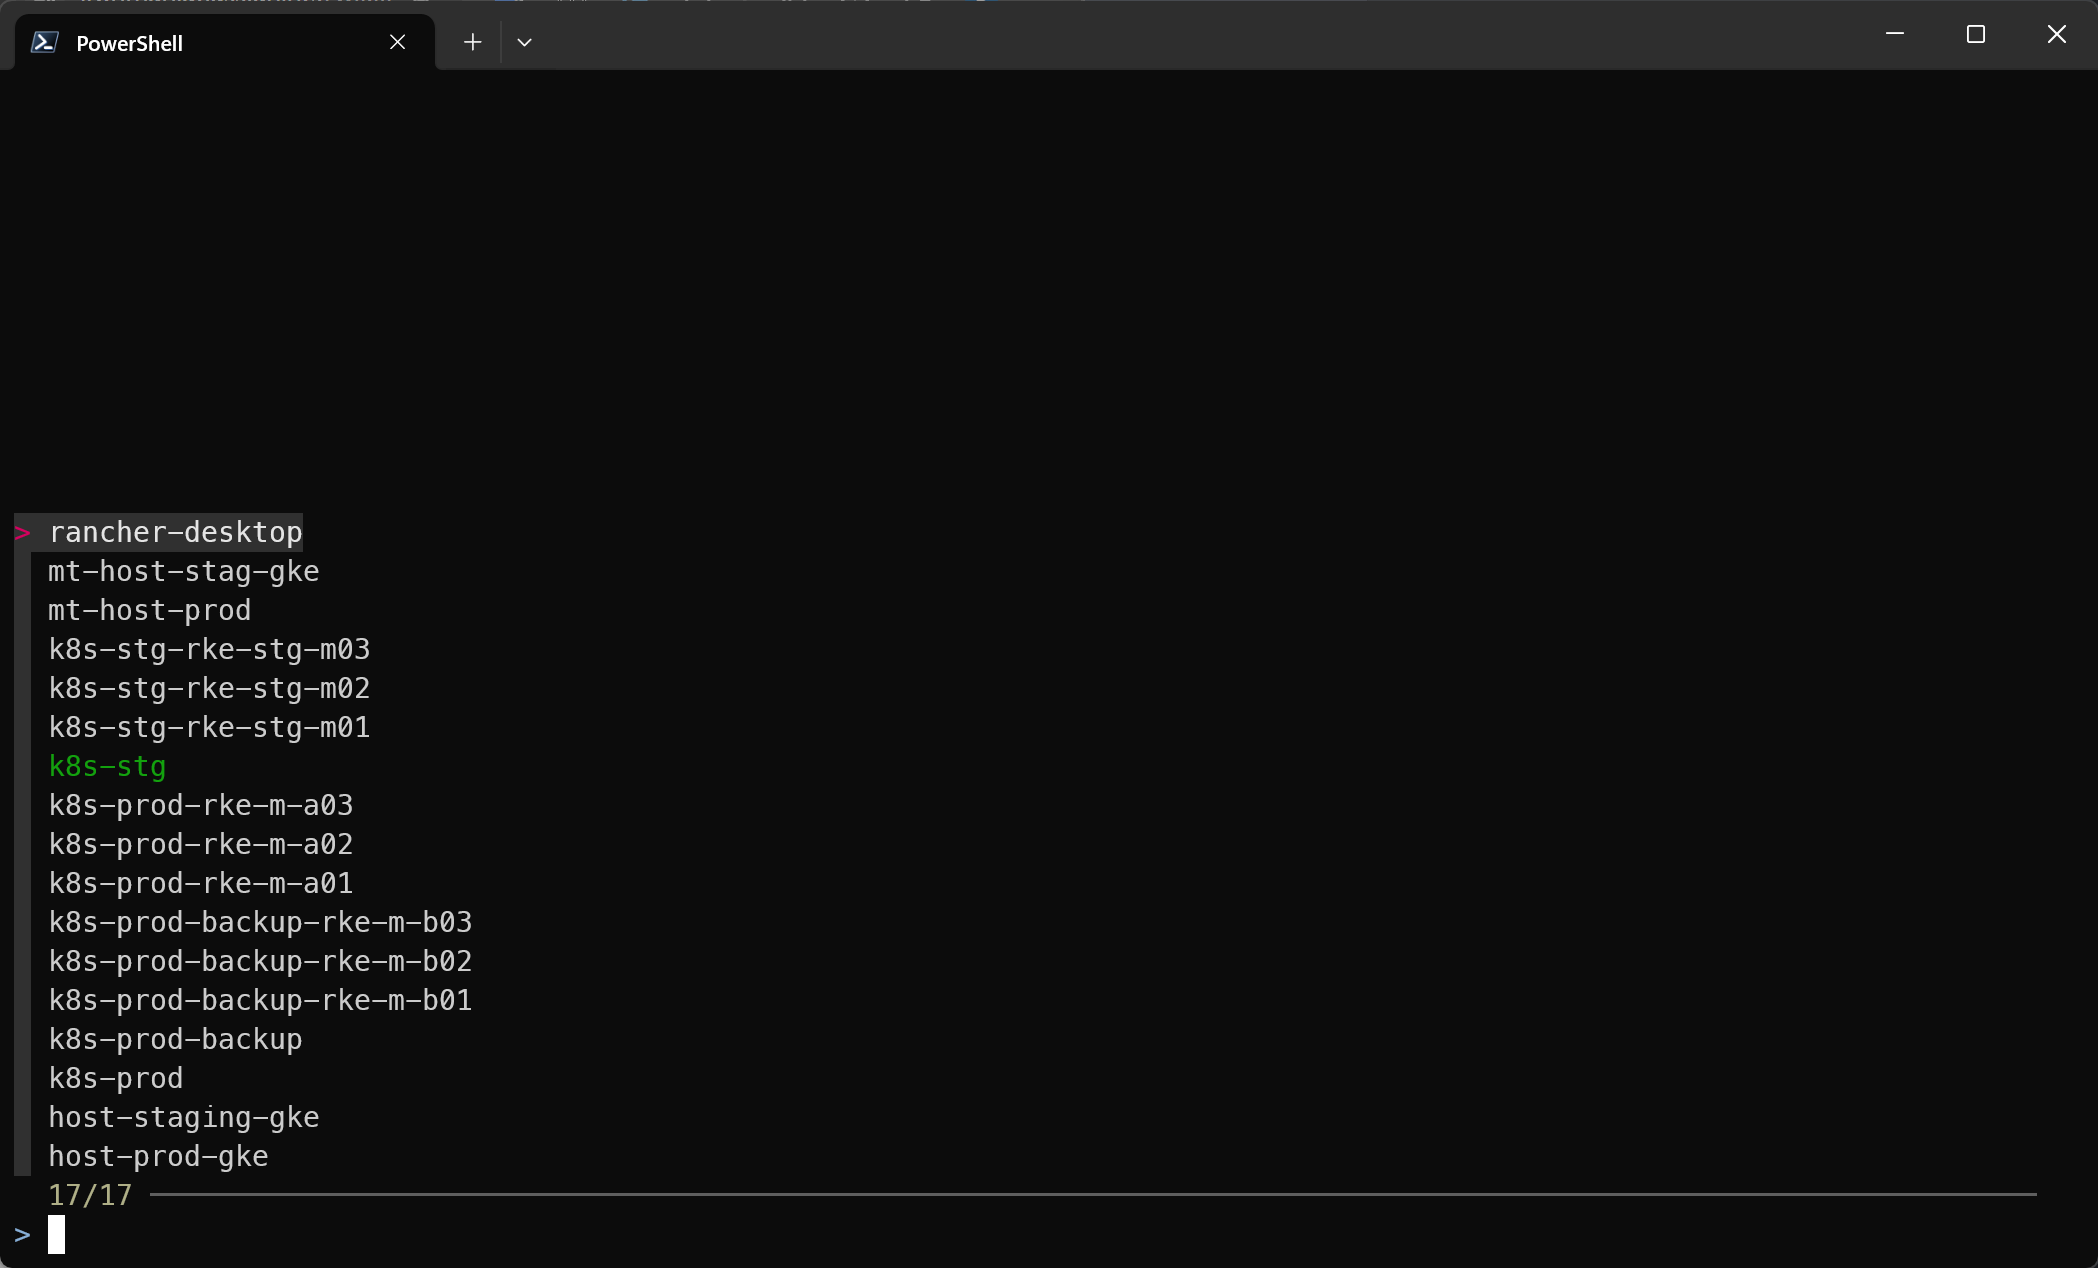
- Switch between namespaces (by kubectl)
1
| kubectl config set-context k8s-stg --namespace=${NAMESPACE}
|
- Switch between namespaces (by kubens)
1
2
| Set-Alias k kubectl
Set-Alias kx kubectx
|
1
2
|
(kubectl completion powershell) -replace "'kubectl'", "'k'" | Out-String | Invoke-Expression
|
(Reference.)
ʕ •ᴥ•ʔ:上完 CKAD 的課程後,對相關的概念更熟悉了!


