Step 1: 環境準備
Installing
如果使用的是 windows 系統,
可參考之前寫的Windows 套件管理工具 Scoop來安裝。
Step 2: 安裝 Hexo 並建立資料夾
1 | npm install -g hexo-cli |
1 | hexo init blog |
Step 3: 試著啟動看看吧
1 | hexo server -o |
你應該可以看到一個很簡單的部落格界面,讓我們簡單認識一下其中的結構。
_config.yml: 網站的配置檔案。
scaffolds: 鷹架資料夾,可以讓你快速產生文章的樣板。
source: 原始檔案的存放位置。
themes: 主題資料夾。
Step 4: 選擇一個自己喜歡的主題並安裝
讓我們開啟 _config.yml 找到 theme 的設定,
可以發現剛剛套用的是名叫 landscape 的主題。
我們可以透過Hexo Themes來選擇自己喜歡的主題。
以下推薦幾個比較常見的主題:
- next: 本文示範用的主題,最多工程師使用的主題之一,也因此有最多的 plugin 可以安裝。
- hueman: 筆者使用的主題,覺得相當好看。
- fluid: 撰寫文章時,意外發現也不錯的主題。
- icarus: 與 hueman 為同一名作者。
1 | git clone https://github.com/next-theme/hexo-theme-next themes/next |
(Note.)
這邊建議大家可能會看到兩種安裝方式:npm install & git clone 到 themes。
推薦使用 git clone,可以比較多的自由度。
於 _config.yml 的 theme 設定中
1 | theme: next |
每個主題的安裝方式略有不同,可以參考他們的 github 。
再下一次指令,看看主題變更的如何吧!
1 | hexo server -o |
Step 5: 該是將進度存檔了
1 | git init |
Step 6: 將部落格部署到 github.io
首先在 github 新增一個 private repository 來將 source code 推上去。
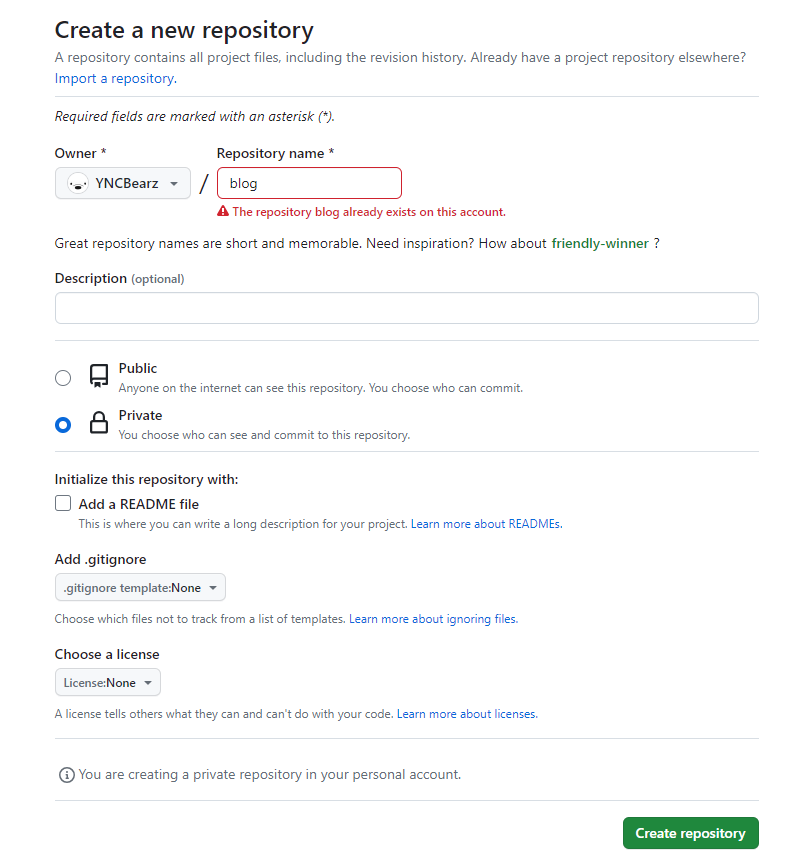
1 | git remote add origin git@github.com:{username}/blog.git |
- git push error (optional)

如果有遇到上述錯誤的話,可參考以下流程。
先查看 git config 中的 email name
1 | git config user.email |
用上述的 email name 產生 ssh key,其中 {your_name} 請替換成電腦的使用者名稱
1 | ssh-keygen -t rsa -b 4096 -C "{your_email}@example.com" |
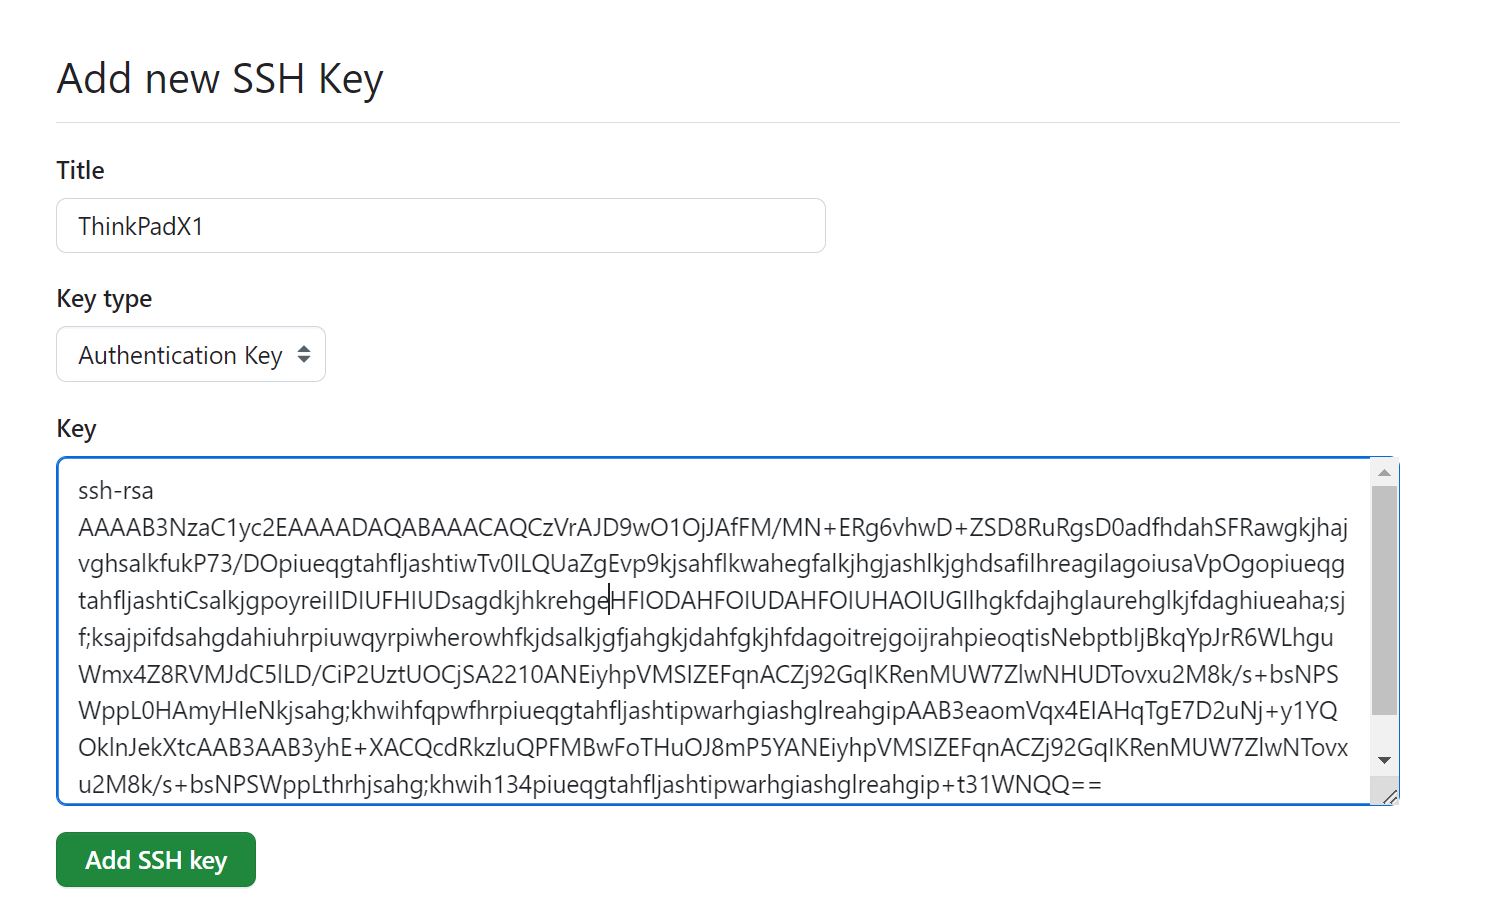
之後到 GitHub / Settings / SH and GPG keys / New SSH Key
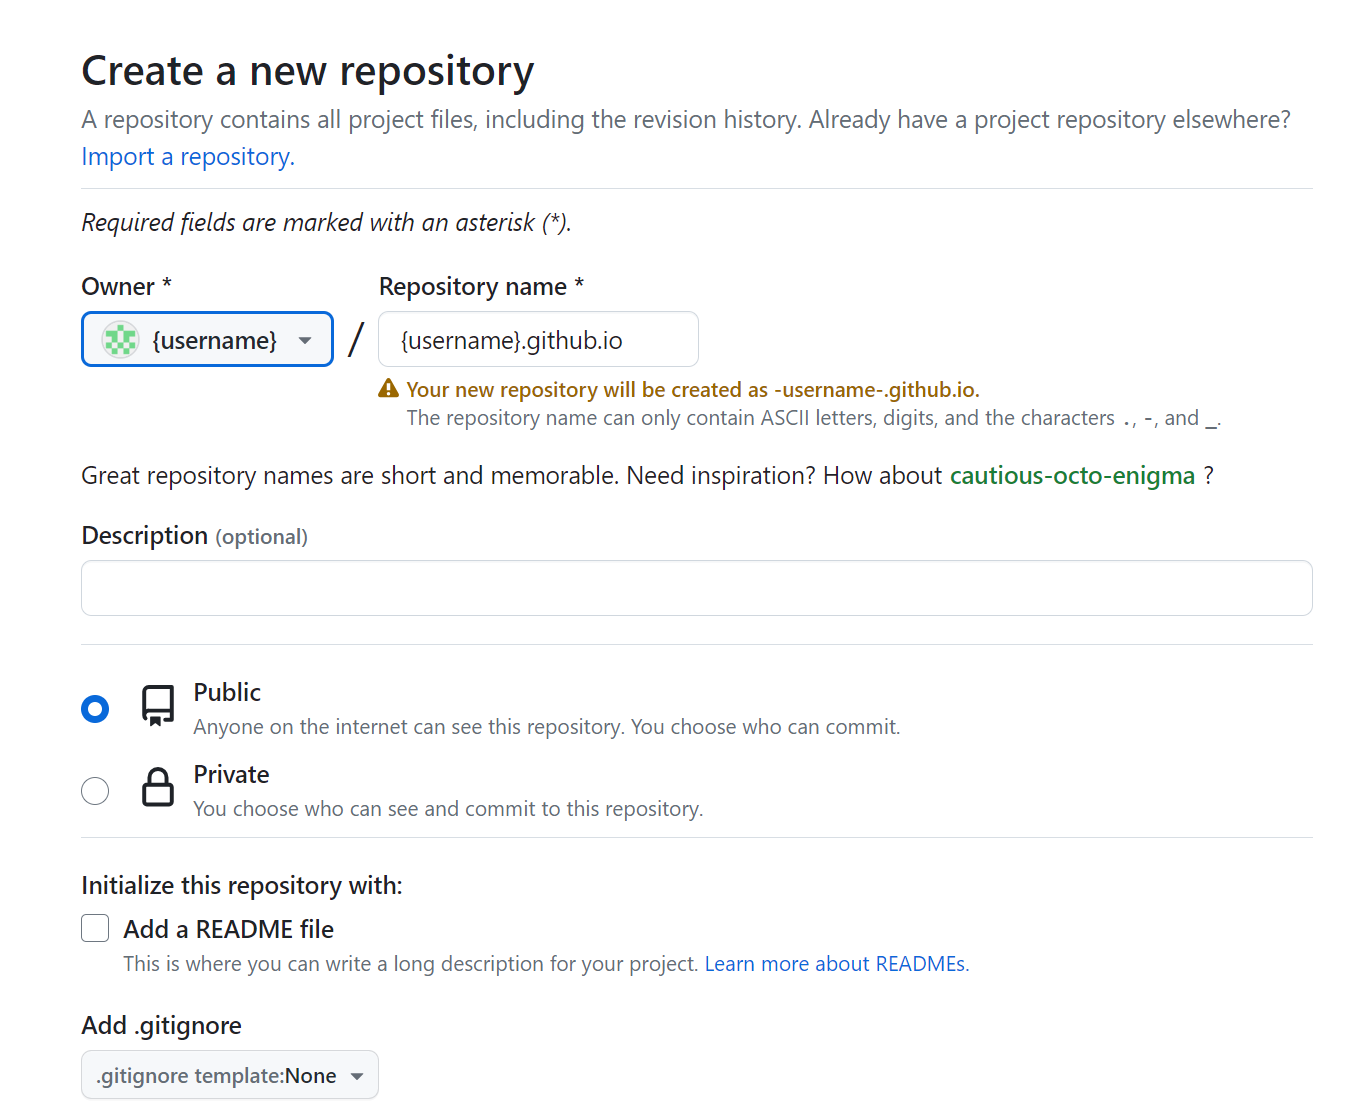
接著新增另一個 username.github.io 的 repository 來作為靜態頁面。
1 | npm install hexo-deployer-git --save |
- 設定 _config.yml
1 | deploy: |
1 | hexo clean & hexo deploy |
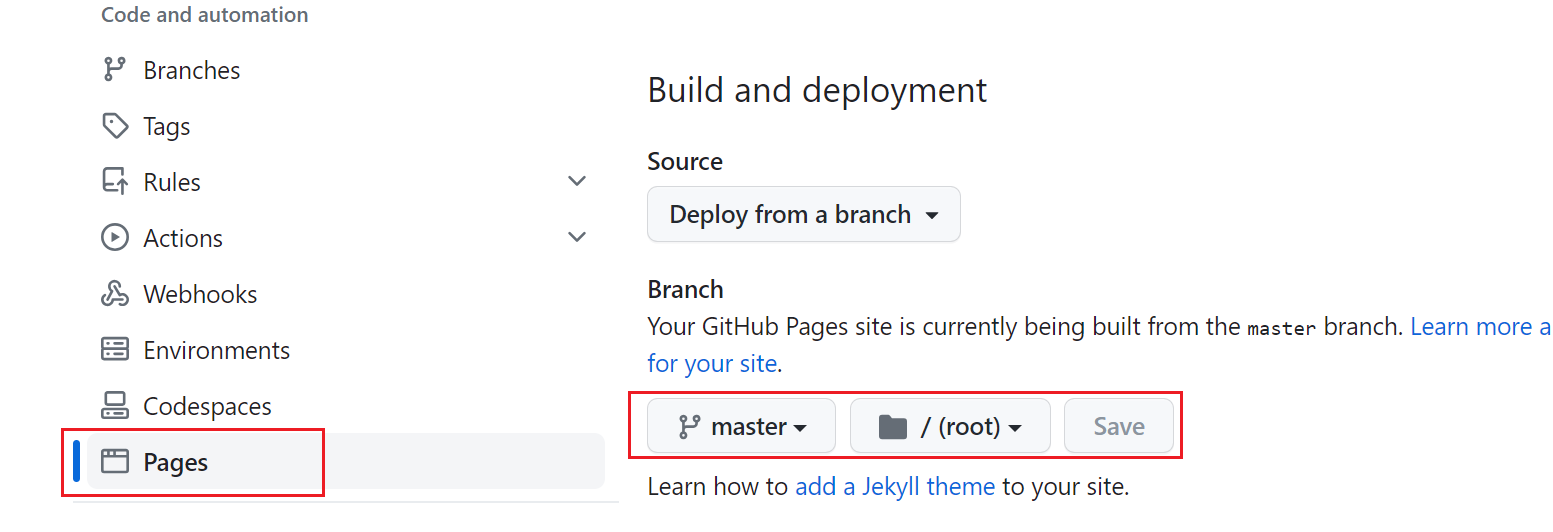
最後設定 github page 即大功告成!
Step 7: 產生 sitemap,讓 Google 搜尋
- 安裝 hexo-generator-sitemap
1 | npm install hexo-generator-sitemap --save |
- 設定 _config.yml
1 | sitemap: |
- 將 sitemap 推上去
1 | hexo clean & hexo deploy |
- 檢查 sitemap.txt
1 | https://{username}.github.io/sitemap.txt |
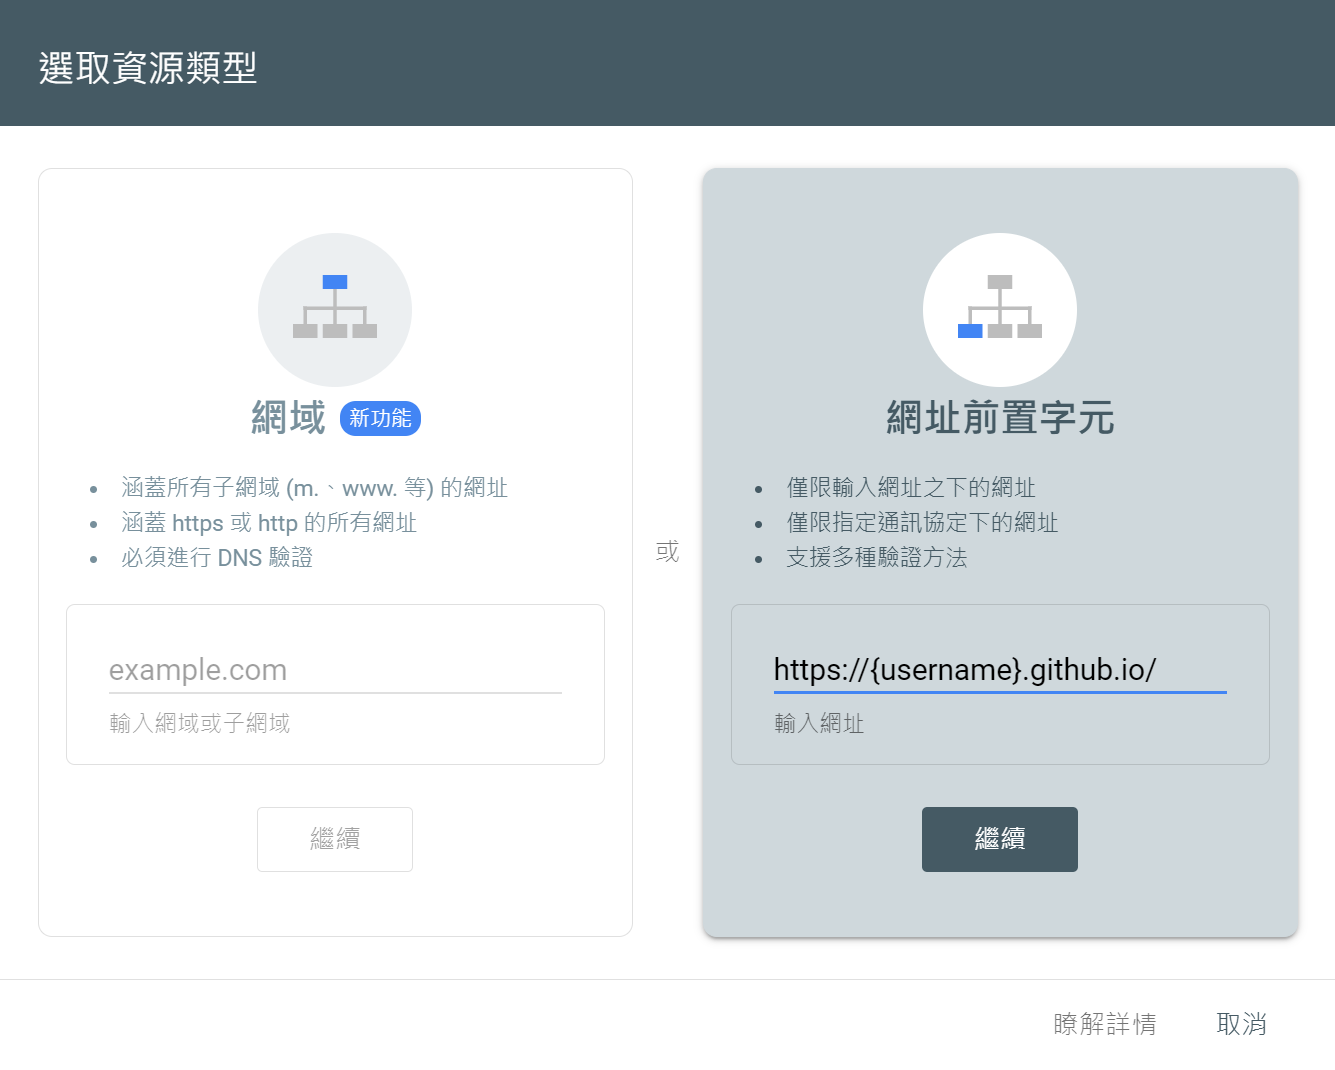
- 設定 Google Search Console

(Reference.)
- Hexo
- Adding a new SSH key to your GitHub account
- 輕鬆地提交 Hexo 部落格的 Sitemap.xml 到 Google Search Console
ʕ •ᴥ•ʔ:希望大家都能 enjoy 寫部落格的過程。